Visualizer
This page describes the different features included in our visualizer and their usage.
Introduction
Our visualizer allows you to visualize simple molecules and complex structures in real-time.
Interface
The visualizer interface consist of three main elements:
The Quick Bar

Located at the bottom of the visualizer viewport, the Quick Bar provides shortcuts for common actions. From left to right:
-
Fullscreen: Enlarges the visualizer to fullscreen (press ESC to exit).
-
Auto Rotate: Toggles a slow, continuous rotation around the Z (up) axis. The rotation origin depends on the camera position.
-
Center: Repositions the structure at the center of the window, making the camera target the structure’s center.
-
Zoom in/out: Adjusts the camera zoom level.
-
Screenshot: Captures and downloads a screenshot of the current view.
-
Toggle projection: Toggles between orthographic and perspective camera projections.
-
Summary: Displays a summary of the structure’s composition.
-
Toggle settings panel: Shows or hides the settings panel.
The Settings Panel
The settings panel includes advanced features, each of which is explained in the following sections.
The Integrated Interface
The integrated interface is found inside the visualizer viewport and contains three elements:
-
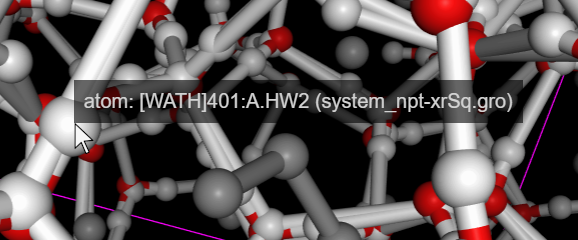
Labeling: Hovering over elements of the structure displays a tag with information about the element.
-
ViewCube: Allows you to manipulate the camera using discrete and predefined movements. Its usage is described in the Navigation’s ViewCube sub-section.
-
Loading: A loading animation appears when a representation is being loaded or a trajectory frame is being downloaded from the server.

Navigation
Our visualizer provides multiple ways to navigate the stage, making it easier to explore your structures:
Mouse and Keyboard
-
XZ Rotation: Hold left-click and drag. Rotates structure around XZ axes (up/down drags around X axis, left/right around Z axis). The rotation pivot point depends on the camera target point.
-
Y Rotation: Hold Ctrl + right-click and drag. Rotates the structure around the Y axis.
-
Focusing: Left-click or middle-click to move the camera, targeting the selected element (atom, residue, or bond).
-
Panning: Hold right-click and drag or hold Ctrl + left-click and drag. This modifies the camera’s target point.
-
Zoom: Use the mouse wheel or hold Shift + left-click and drag.
-
Clipping Planes: Hold Shift + mouse wheel and drag to adjust the near and far clipping planes. This is useful for viewing slices of the structure. If parts of the structure are being cut off when you rotate, this is likely due to clipping.
ViewCube
The ViewCube is located on the bottom-right corner of the visualizer viewport. It displays the current orientation of the camera using a representation of the 3 axes (X, Y, Z) and a cube with its faces labeled according to the corresponding view. It allows fast positioning in the desired view.
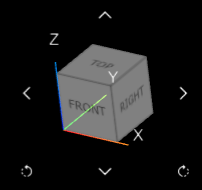
The ViewCube provides multiple navigation functionalities:
-
Snap to View: Clicking on the edges or faces of the ViewCube with the left mouse button snaps the camera orientation to the selected view.
-
90 degree rotation: Clicking on the side buttons (sides and bottom arrows) performs a 90-degree rotation of the camera in world space.
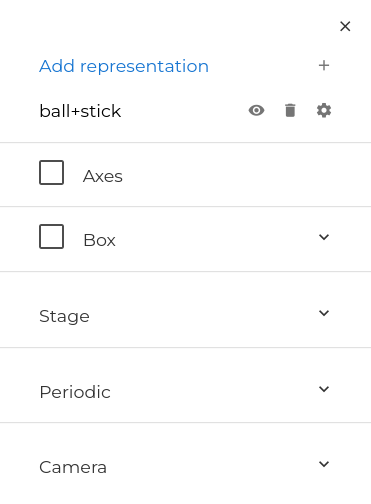
Axes
You can toggle the visualization of the structure axes (orientation) by checking the Axes option located in the top section of the settings panel. The shown axes are placed at the center of the structure.
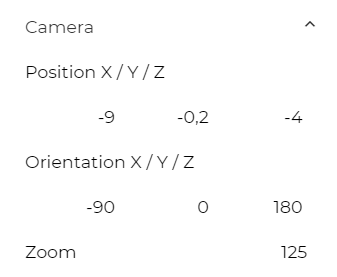
Camera Values
You can modify the position, orientation and zoom of the camera using the Camera section located in the settings panel.
Camera Projection
Switch between perspective (Persp) and orthographic (Ortho) view mode by changing the camera projection using the toggle button in the Quick Bar.
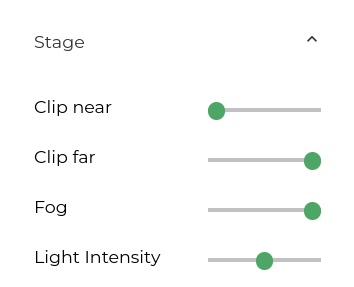
Stage Settings
In the Stage section of the settings panel you can modify some of the stage parameters to improve your visualization. These parameters are:
-
Clip Near: Sets the distance of the near plane, defining how close elements must be to be rendered.
-
Clip Far: Sets the distance of the near plane, defining how close elements must be to be rendered.
-
Fog: Adjusts the fog distance, defining how far from the camera fog begins to render.
-
Light Intensity: Controls the light intensity (saturation).
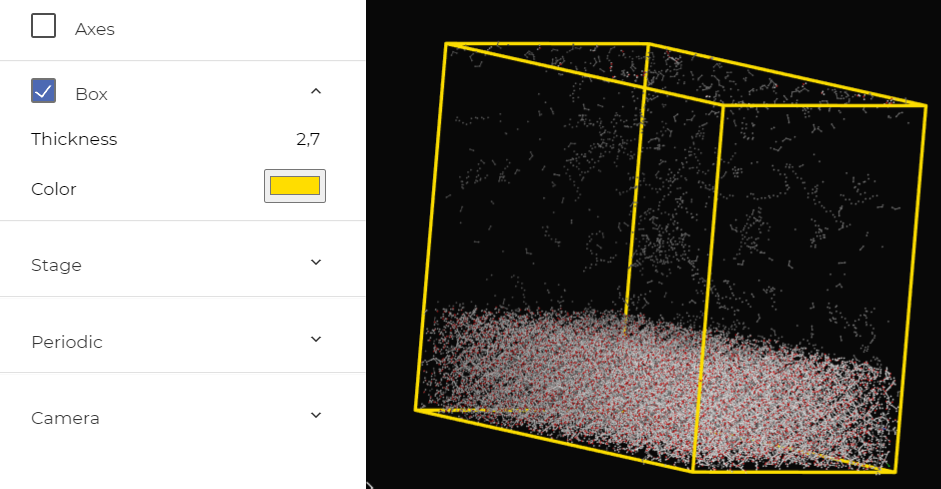
Bounding box
Structure files may define a bounding box that encloses the structure. You can visualize this bounding box by checking the Box option located at the top section of the settings panel.
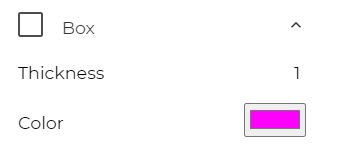
You can also modify the color and thickness of the bounding box.
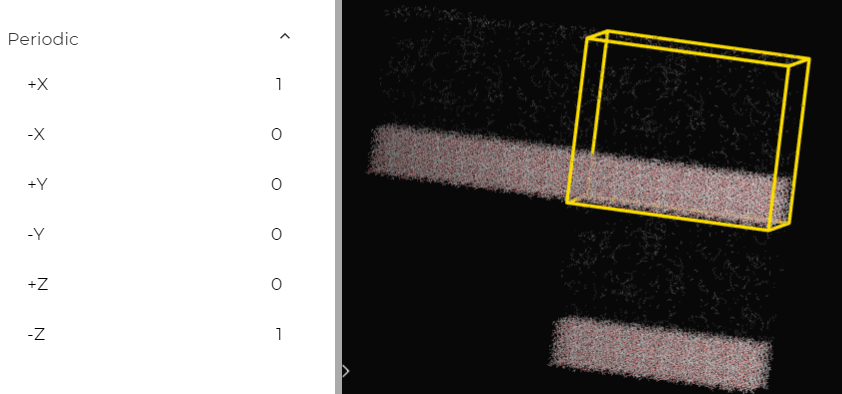
Periodic visualization
Our visualizer provides the option of visualizing periodic representations of the structure along any axis (positive or negative X, Y, Z) to help clarify structure boundaries. You can enable the periodic representation for any axis in the Periodic section of the settings panel.
Representations
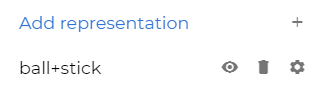
The visualization settings of the structure can be modified from the top side section of the settings panel. This section lists all current representations of your structure (just ball+stick in the image below), with three buttons for each representation. From left to right:
-
Visualization: Toggles the visibility of the representation.
-
Remove: Removes the representation.
-
Settings: Opens or hides the representation settings panel.
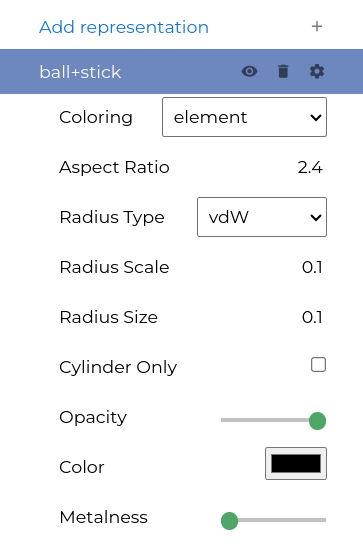
Each type of representation may have different settings, which control how the structure is visualized. Feel free to explore these settings to see how they affect the display.
Multiple Representations
In some cases, you may want to “highlight” some elements of your structure or “stack” different types of representations. You can add a new representation for a subset of elements by selecting the Add Representation option in the settings panel.This opens a small panel where you can select the representation type, the affected entity, and the elements within that entity.
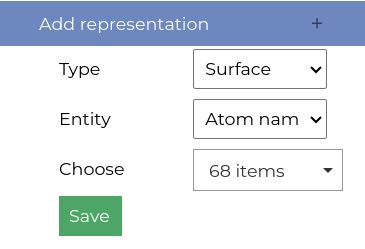
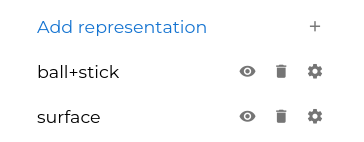
Once saved, the new representation will appear in the list of representations described in the representations section.
Trajectories
If your structure has an associated trajectory, our visualizer can play it. When a trajectory is available, controls will appear beneath the visualizer viewport.

The trajectory visualization controls include, from left to right:
-
Play
-
Stop
-
Pause
-
Move to the previous frame
-
Move to the next frame
-
Move to the first frame
-
Move to the last frame
-
Current frame and total frame count
The first time a frame is loaded, it must be downloaded from our trajectory server. Once a frame has been downloaded, it does not need to be downloaded again. This means that initial frame loading may take extra time, but subsequent views of the trajectory will play at full speed.